
Pathfinder build project – year one (2021).
It’s late Autumn 2022, wet and cold too so I’m not spending much time in the workshop – rather i’m trying to do lots of thinking and writing. Now that the main construction is done and in fact moving towards a finished boat, I thought I might do a pair of posts , mainly as photo tours of the build during the two seasons that it’s taken.
I think now that I should have started the build in 2021 when the Covid lockdowns all happened – I had to be mostly at home and had little to do aside from a daily walk and hours spent in front of the computer. Thinking back to that weird first year I find it very hard to say what I actually did and like many people I feel that somehow I lost an entire year when I was sitting around waiting perhaps to be deployed to an ICU again – it never happened.
That year I talked myself in and out of building a boat and then in and out of several different design options – in fact , right up until I put pencil to wood I nearly didn’t build the Pathfinder but John (Welsford) more recent design – his sail and oar expedition boat ‘Long Steps’. The final push to start building a boat was the sheer BS that came about with the pandemic panic lockdowns ; we only know now that they were an utter waste of time and had only the most marginal impact on the prevention the spread of the virus but now of course the government and media have found new things to spread fear about – it’s almost like they’re saying ‘what pandemic‘ ? now.
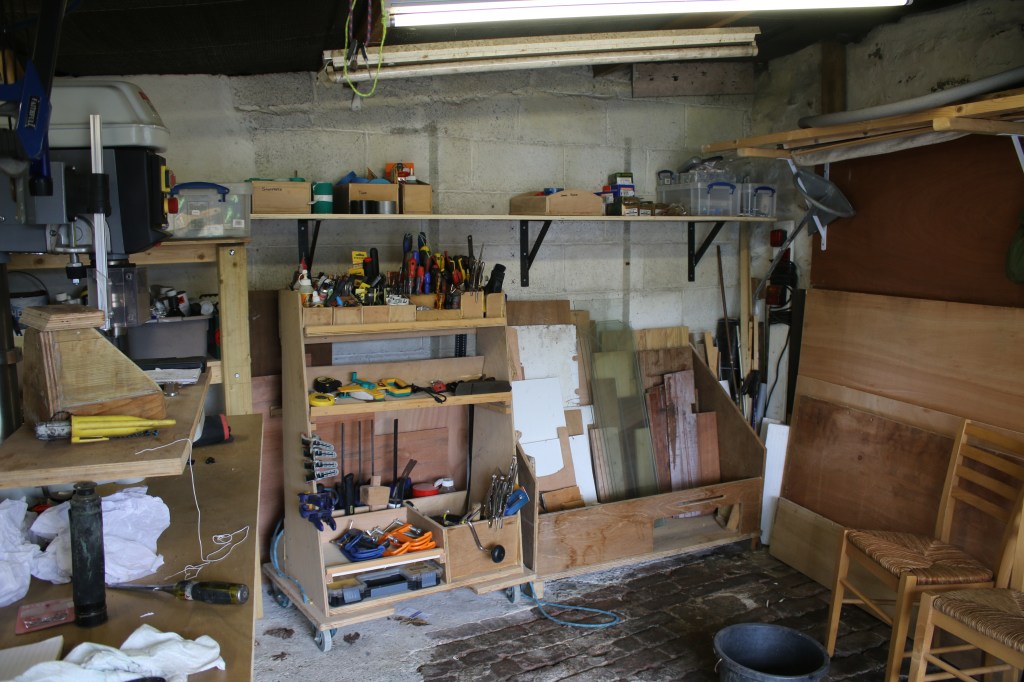
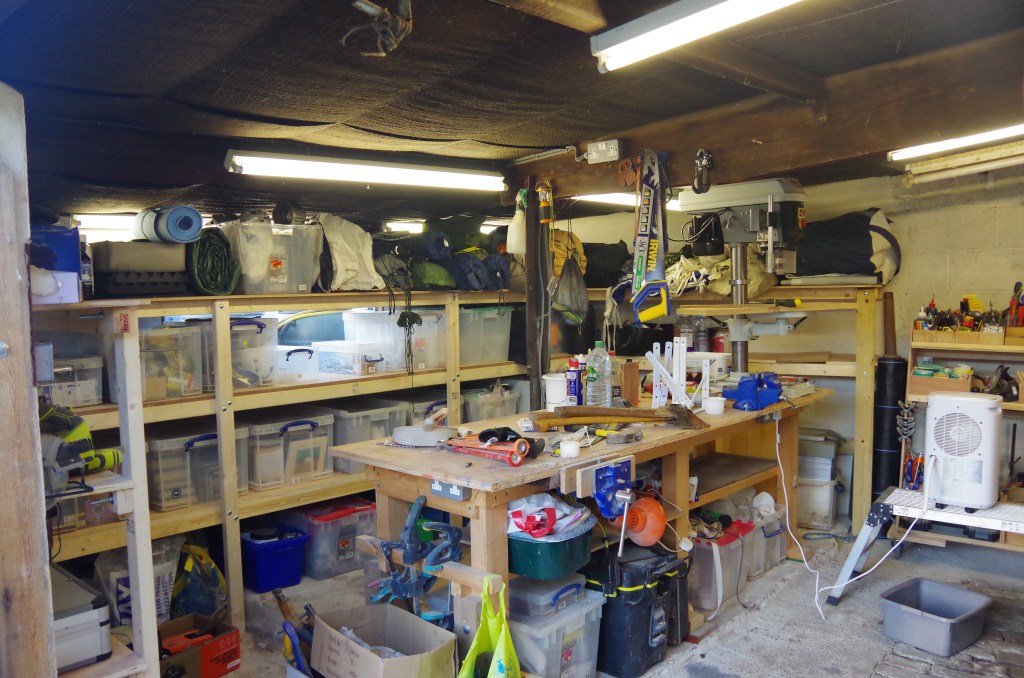
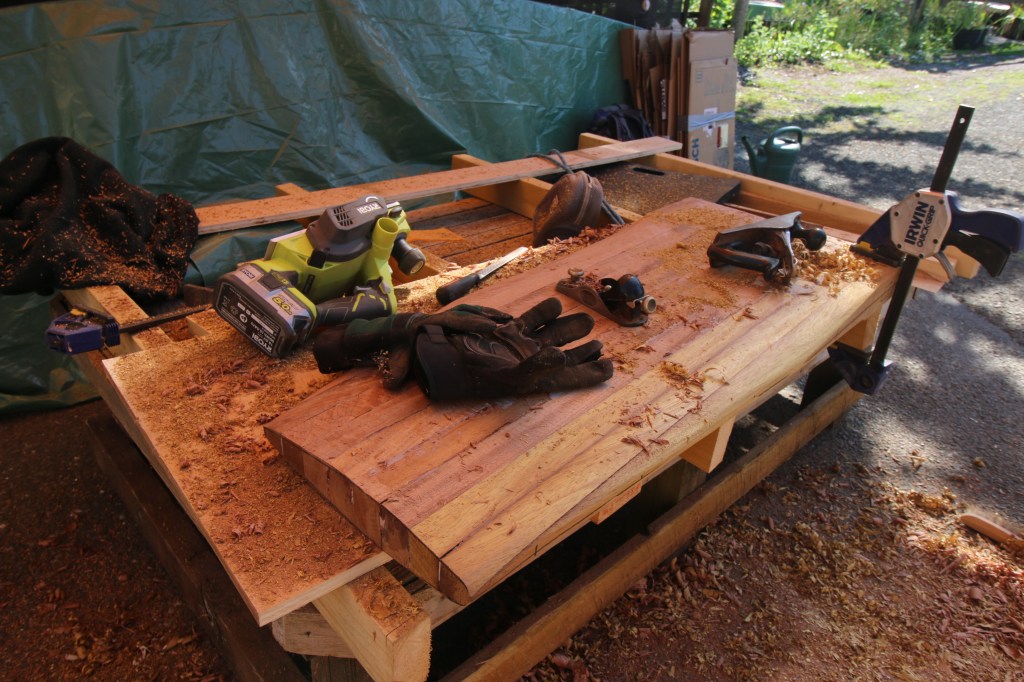
Stage 1, shelter, workshop, tools and building frame.
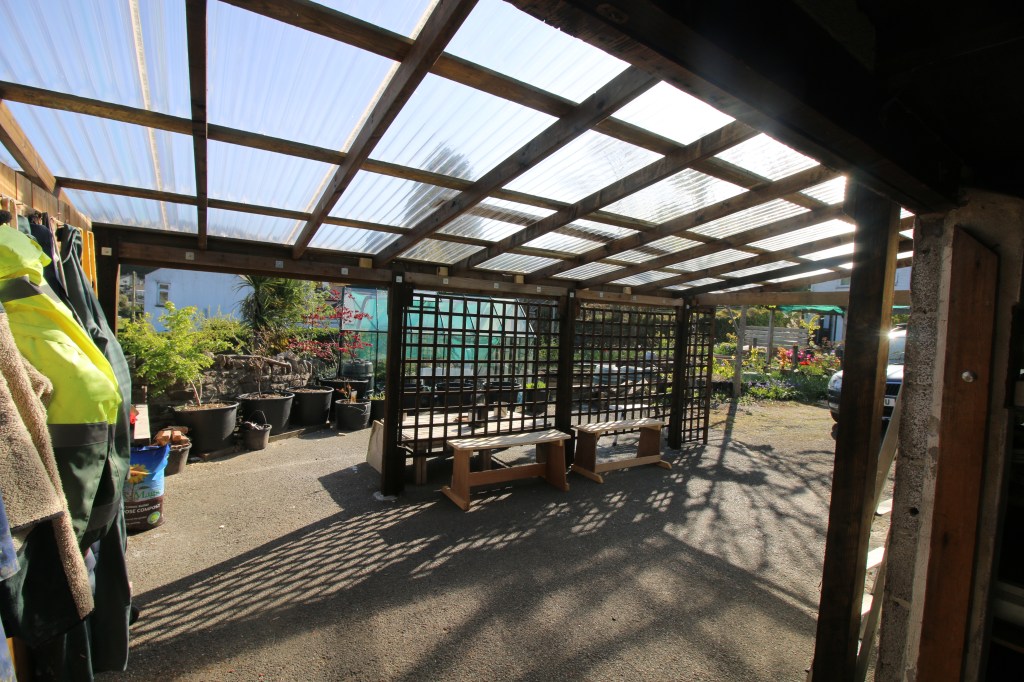
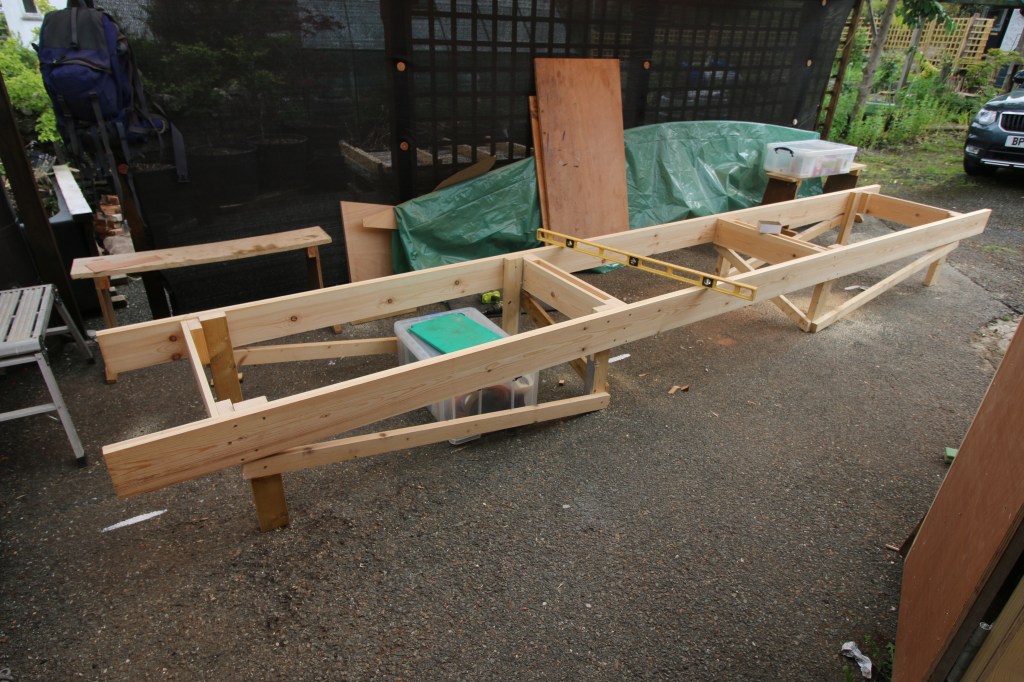
I have a workshop but not only is it damp and cold but it’s also nowhere near big enough to build a 17 foot boat in there. I did think that perhaps I could work on single sheets of plywood in there and basically make the ‘kit of parts’ in there but there wasn’t even really room for that so my first jobs were to build the outside shelter, make the building frame, sort the bench and tools out, make a tool rack and epoxy station and invest in some new tools.
Post links.
Tools : https://dirtywetdog.co.uk/2021/03/29/a-bit-of-a-tool/
Plans : https://dirtywetdog.co.uk/2021/04/12/plans-studied/
Epoxy station : https://dirtywetdog.co.uk/2021/06/04/mrs-mops-trolley-of-stickyness/
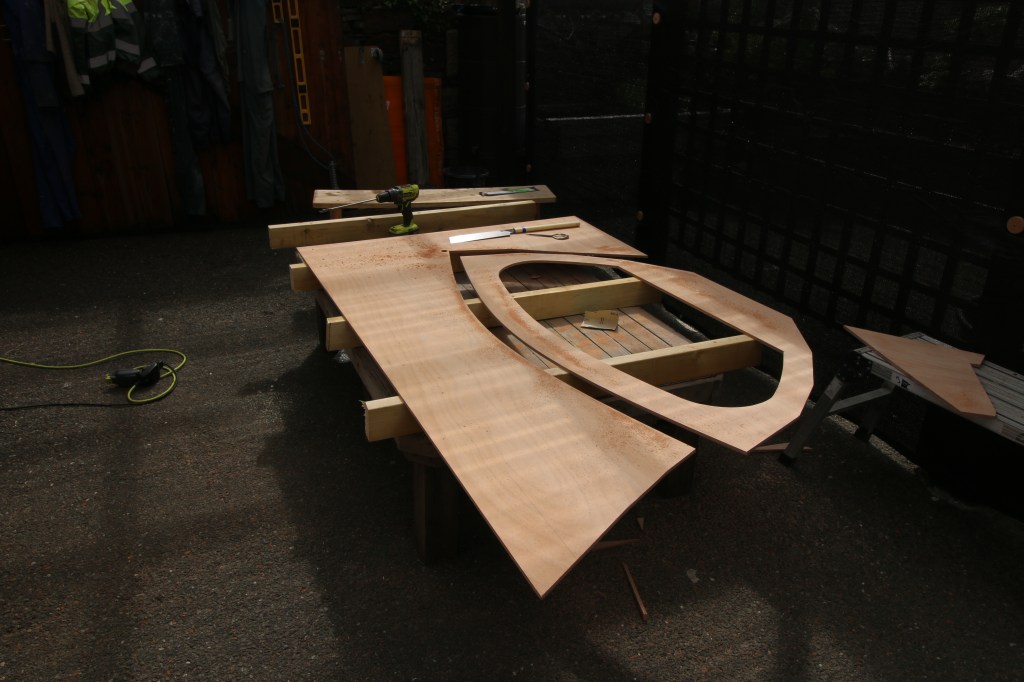
Stage 2 – making the kit of parts.
The postie dropped off a set of plans one morning as I was sat outside on the garden bench and wondering what to do that day – by the end of that day i’d read through the instructions, looked at some of the plans sheets to get an impression of the boat as a structure and then started composing a big order of timber to a company in Bristol. In the first order I just ordered all of the plywood that the plans said I would need – I did end up buying a few more sheets later on – but i didn’t get the softwood (Douglas Fir) for the stringers and other parts : they came from a local supplier (John Moody) just over the border in Devon.
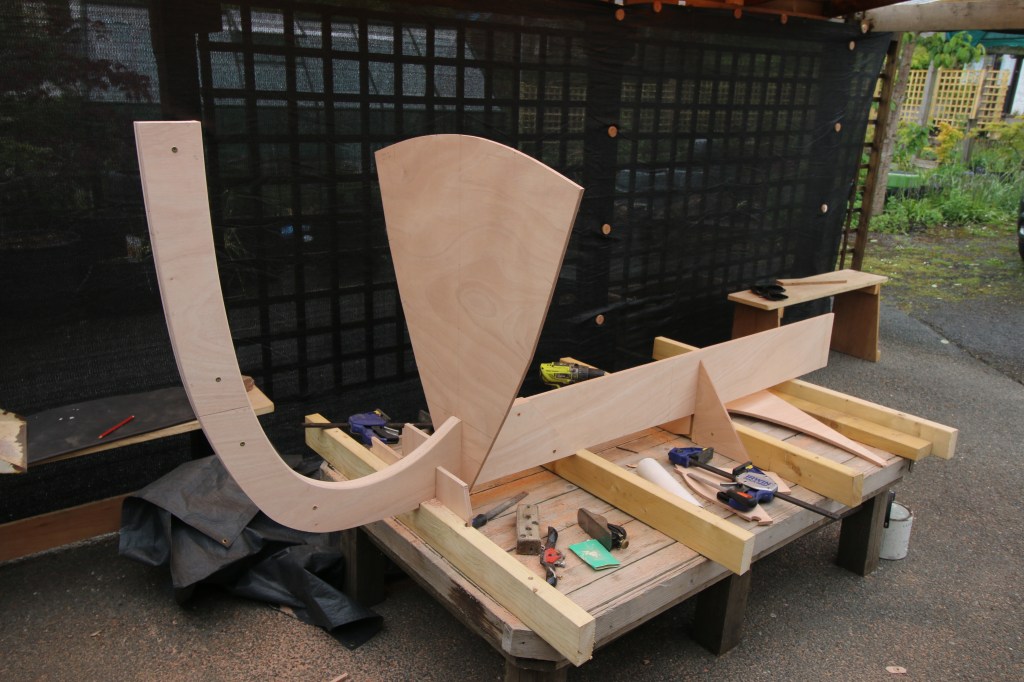
Before I started to make actual parts from the posh boatbuilding plywood I had a couple of tries at making the first bulkhead out of domestic plywood because I had some lying around – it felt at the time that i was making mistake after mistake even at this most basic stage, said to be the easiest stage of the build. Making the ‘kit of parts’ should be simple as the idea is to simply mark out a series of XY coordinates as per the plans, join the dots (or Xs) and then cut to the mostly straight lines. I got better at it when I finally summoned up the courage to put pencil to actual wood and just damn well make a proper piece.
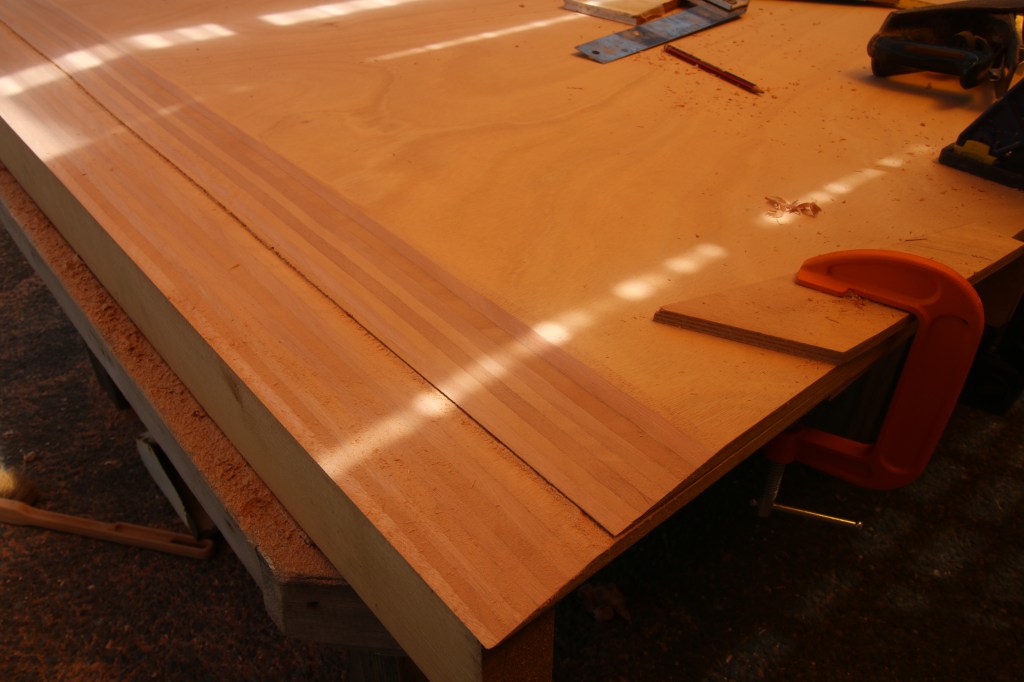
Said to take just a few days I was a couple of weeks just marking and cutting out the frames – sometimes made in several pieces and glued together, then the bow girder which is a curved piece so the skill involved went up a notch and then the first really big job which was scarfing together the 2 sheets of 12mm plywood to make the bottom panel of the entire boat. Carefully and accurately marking and planing my first scarf joint felt like a huge step forward in my woodworking ability – for some reason I thought of that job to be super hard when in fact it went smoothly.
Post links.
Scarfing : https://dirtywetdog.co.uk/2021/06/07/cutting-remarks/
Marking and cutting : https://dirtywetdog.co.uk/2021/06/07/cutting-remarks/
Patterns : https://dirtywetdog.co.uk/2021/05/24/orange-man-bad-
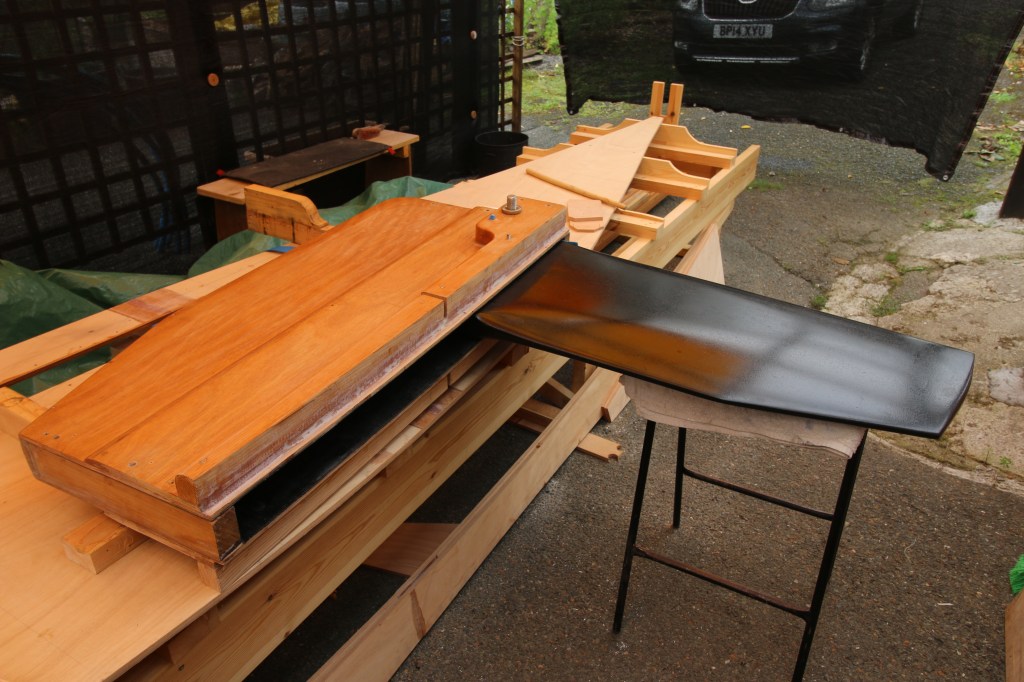
Stage 3, making a board and case.
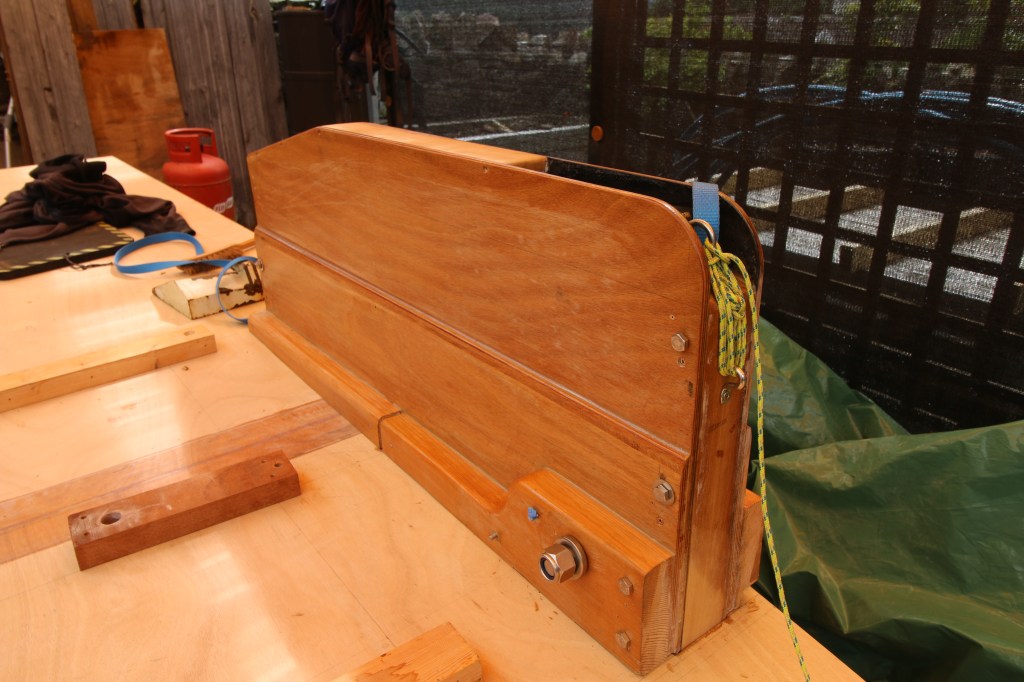
The longest stage early on, when progress was slow, was making the laminated centerboard and it’s case. Making the lammells for the board was easy enough but when it came to gluing and clamping the 13 pieces all together at the end of a warm afternoon with warm epoxy I nearly lost the whole job as the epoxy started to gel. I used all of the big clamps that I owned at the time to get that part of the job done – then there was the long stage of shaping the board to an aerofoil shape and then the surprisingly difficult job of boring a wide hole square through the board and case sides to take (eventually) the pivot.
There was no way that I could get either the whole assembly under the bench drill or just the board……and I did try….so in the end it was my mate Big Al who said to make a drill guide and iv’e been using that trick ever since.
The other entirely new experience was melting and casting a lead plug for the centerboard ballast – I thought I was being clever by retrieving the lead from some old lead-acid batteries but in fact most of the lead is in the wrong form (lead sulphide rather than metallic lead) and has to be heated to something like 900 centigrade to reduce the salt. In the end I had to buy some lead sheet and work with that and a pork pie tin as a casting mold.
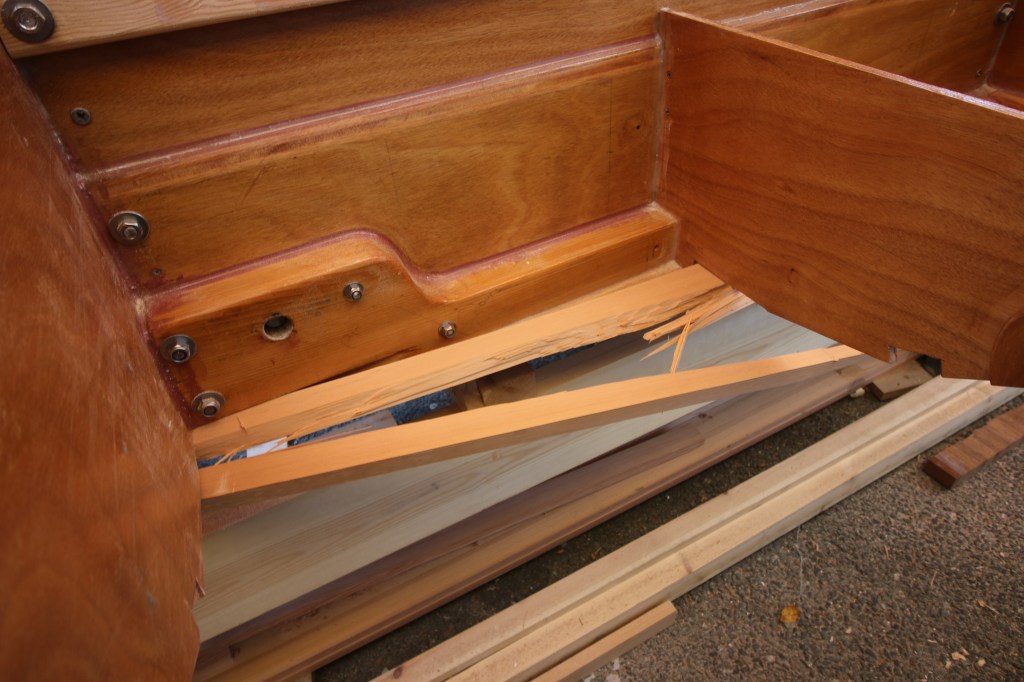
My most major deviation from the plans happened right at this stage in that I decided to have an asymmetric layout with the board case sited as far to port as I could get it and to have it partially supported on that side by the wide bilge stringer when I got around to fitting it.

Post links.
Centerboard construction : https://dirtywetdog.co.uk/2021/07/19/are-we-board-yet/
Shaping : https://dirtywetdog.co.uk/2021/06/28/shaping-up-nicely/
Lead retrieval and casting : https://dirtywetdog.co.uk/2021/05/07/sqd-pb-fail/
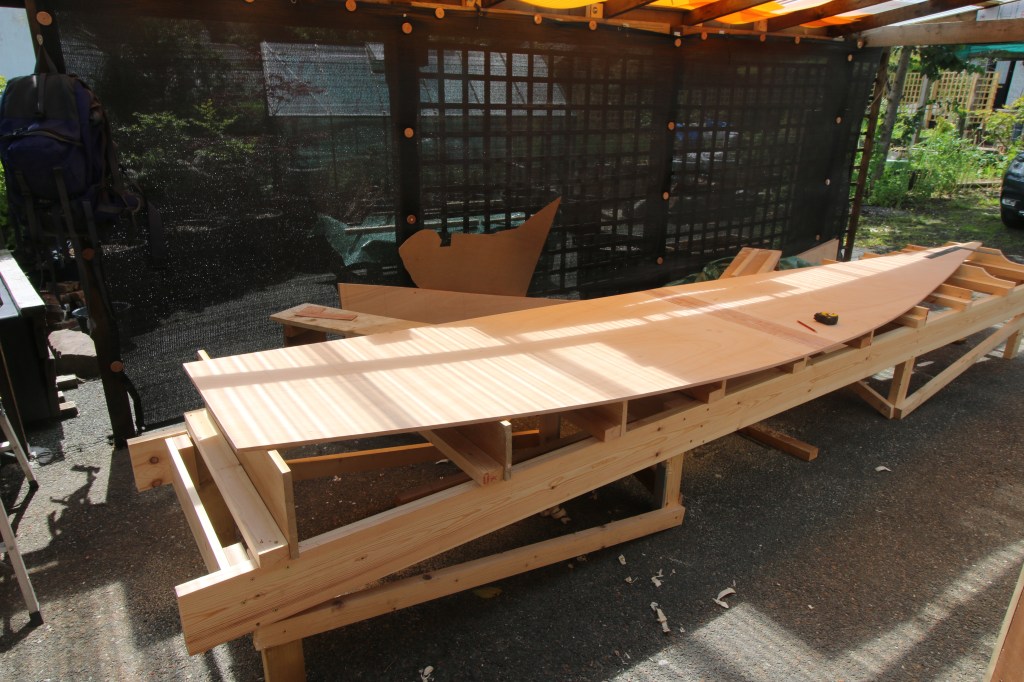
Stage 4, assembling the kit of parts.
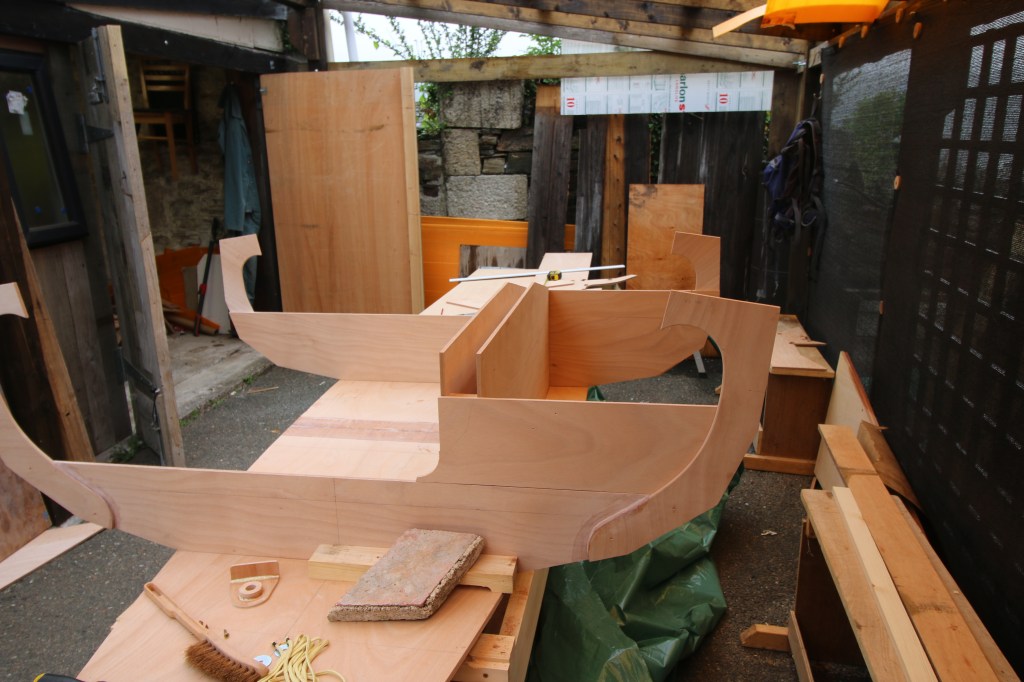
With building the board and it’s case it seemed as though the summer was slipping past with no visible progress and just a pile of odd shaped pieces of plywood stacked up at one end of the workshop. Then, in just one week of work I had a boat shaped structure on the bench when first the bow frame and girder went on, then the next frame and the next, the board and case went in with help from my neighbour , then the next frame aft and so on right back to the sloped transom.
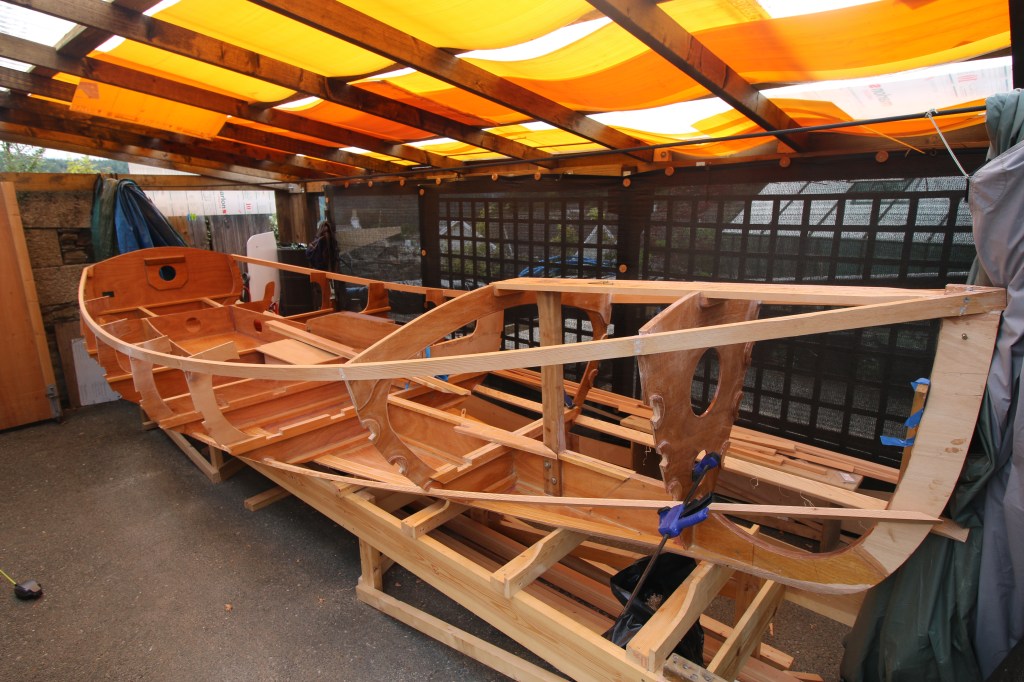
Stage 5, bending, twisting and lots of swearing.
Just when I began to think ‘hey, iv’e got this’ it came time to attach the 4 pairs of stringers that run the whole length of the boat and notch into the bow, each frame and the transom. The first stringer to go in – or at least to attempt to go in – was the wide bilge to garboard plank stringer which was at first a 70 x 20 mm length of springy/stiff Douglas Fir. The problem was that the relatively stiff stringer had to bend in 2 planes at once – the ‘face’ bend was ok but trying to also force it into an edge bend took far more clamping and heaving-in force than I was comfortable with.
In fact, I had one side getting sort-of close so I moved to the other side and slowly started clamping that one inwards a bit at a time, the force on the clamps just went up and up so I decided to take a break and I was halfway up the drive when there was an almighty bang behind me as the stringer literally exploded.
For the first time in the whole project I didn’t know how to proceed so I asked on the designer’s forum page and the answer/s were to either steam the stringer or make a laminated one ; I made and set up a steaming rig just in case of future problems but got straight on with buying 6 new lengths of narrower Douglas Fir and making a pair of 3 piece laminated stringers in situ….because of set-up, gluing and clamping it took 3 days but it worked and it was surprisingly low stress compared to what had gone before.

Post links.
Exploding stringers : https://dirtywetdog.co.uk/2021/09/13/doing-the-splits/
Stringers : https://dirtywetdog.co.uk/2021/09/27/fifty-shades-of-stringer/
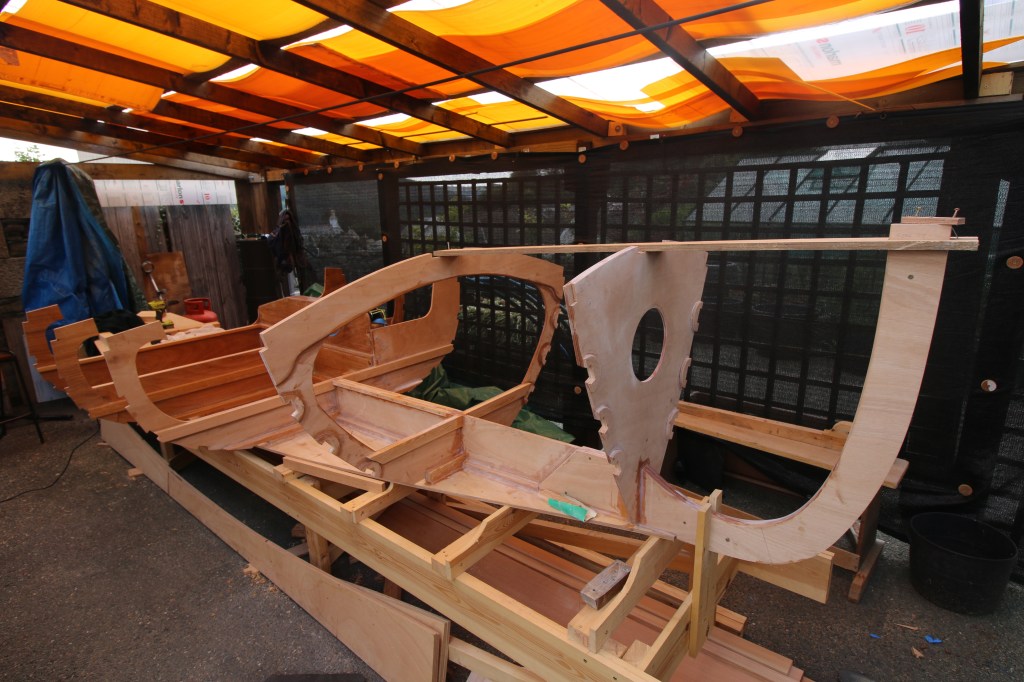
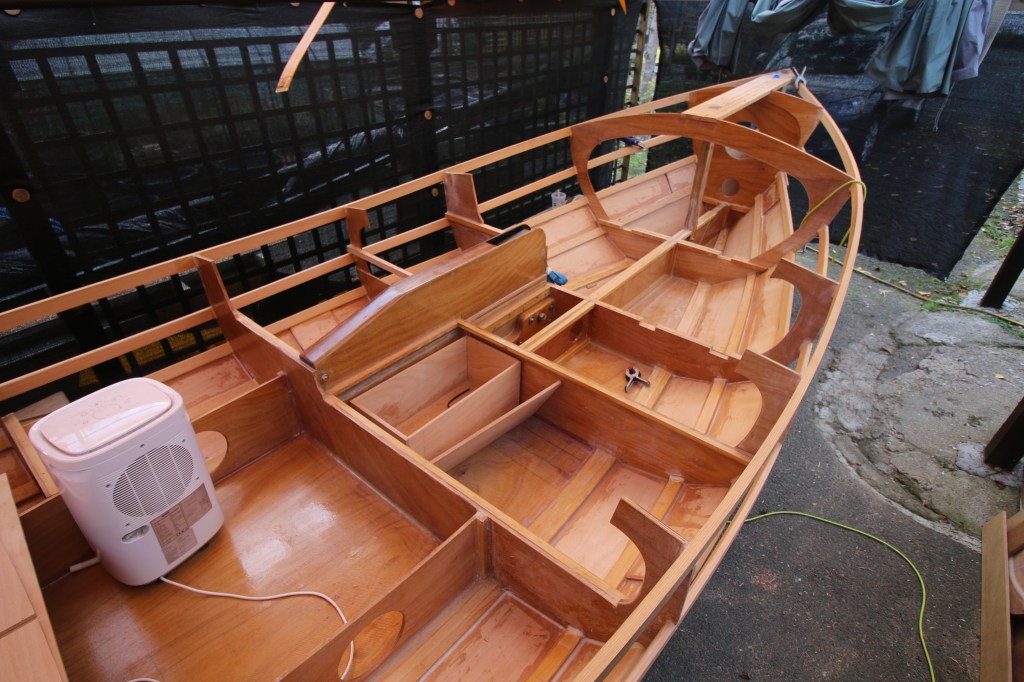
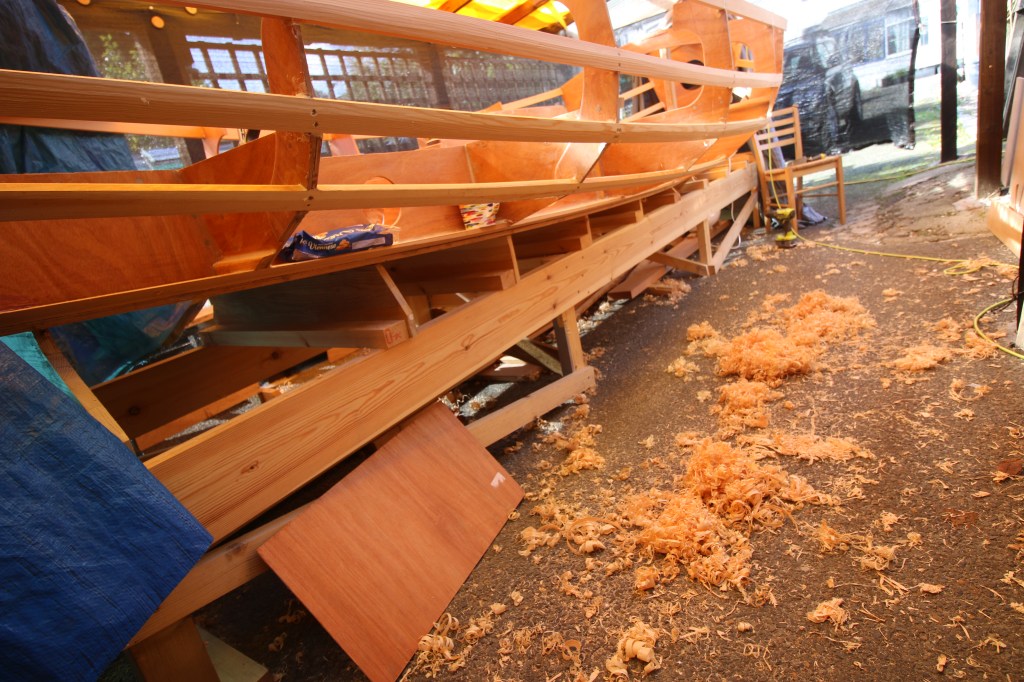
Stage 6, planking and the end of the year.
September, and I felt as though I was running out of time for working outside and with the greatest amount of material to mark, cut , shape and attach to the stringers ; that was literally the skin of the boat in the form of 4 planks each needing 3 pieces joined with plywood pads. Before I even started that I first had to shape each stringer with a bevel or a pair of bevels to take the planks as I glued and screwed them on. Just planing the stringer bevels took several days and then I started the long job of making patterns for the hull planks , making and fitting those,
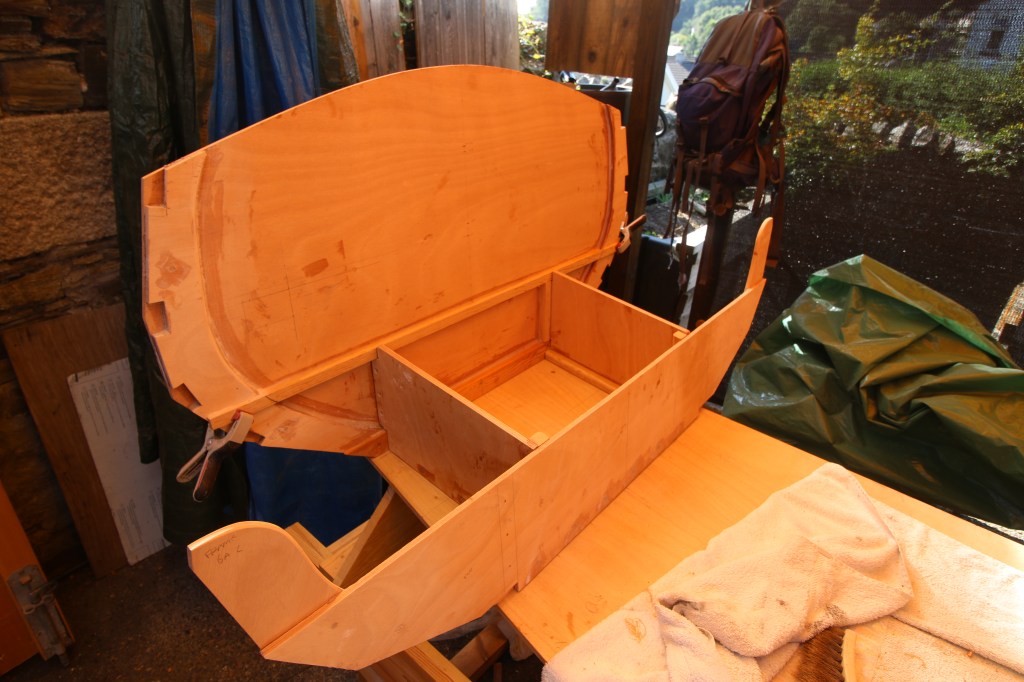
The hardest and most stressy part of that job came with the bow section of the first plank because it both bends along it’s length and tortures slightly across it’s width because the bow of the boat is slightly hollow……looks great when it’s on but a complete sod to get there.
Planking took ten days in total and after I got the first 2 planks on I started to epoxy coat all of the inside of the hull and frames ; one thing that became apparent was that the epoxy was curing but maybe it cool enough and damp enough to give me an amine blush which all had to be wet sanded off as I went along.
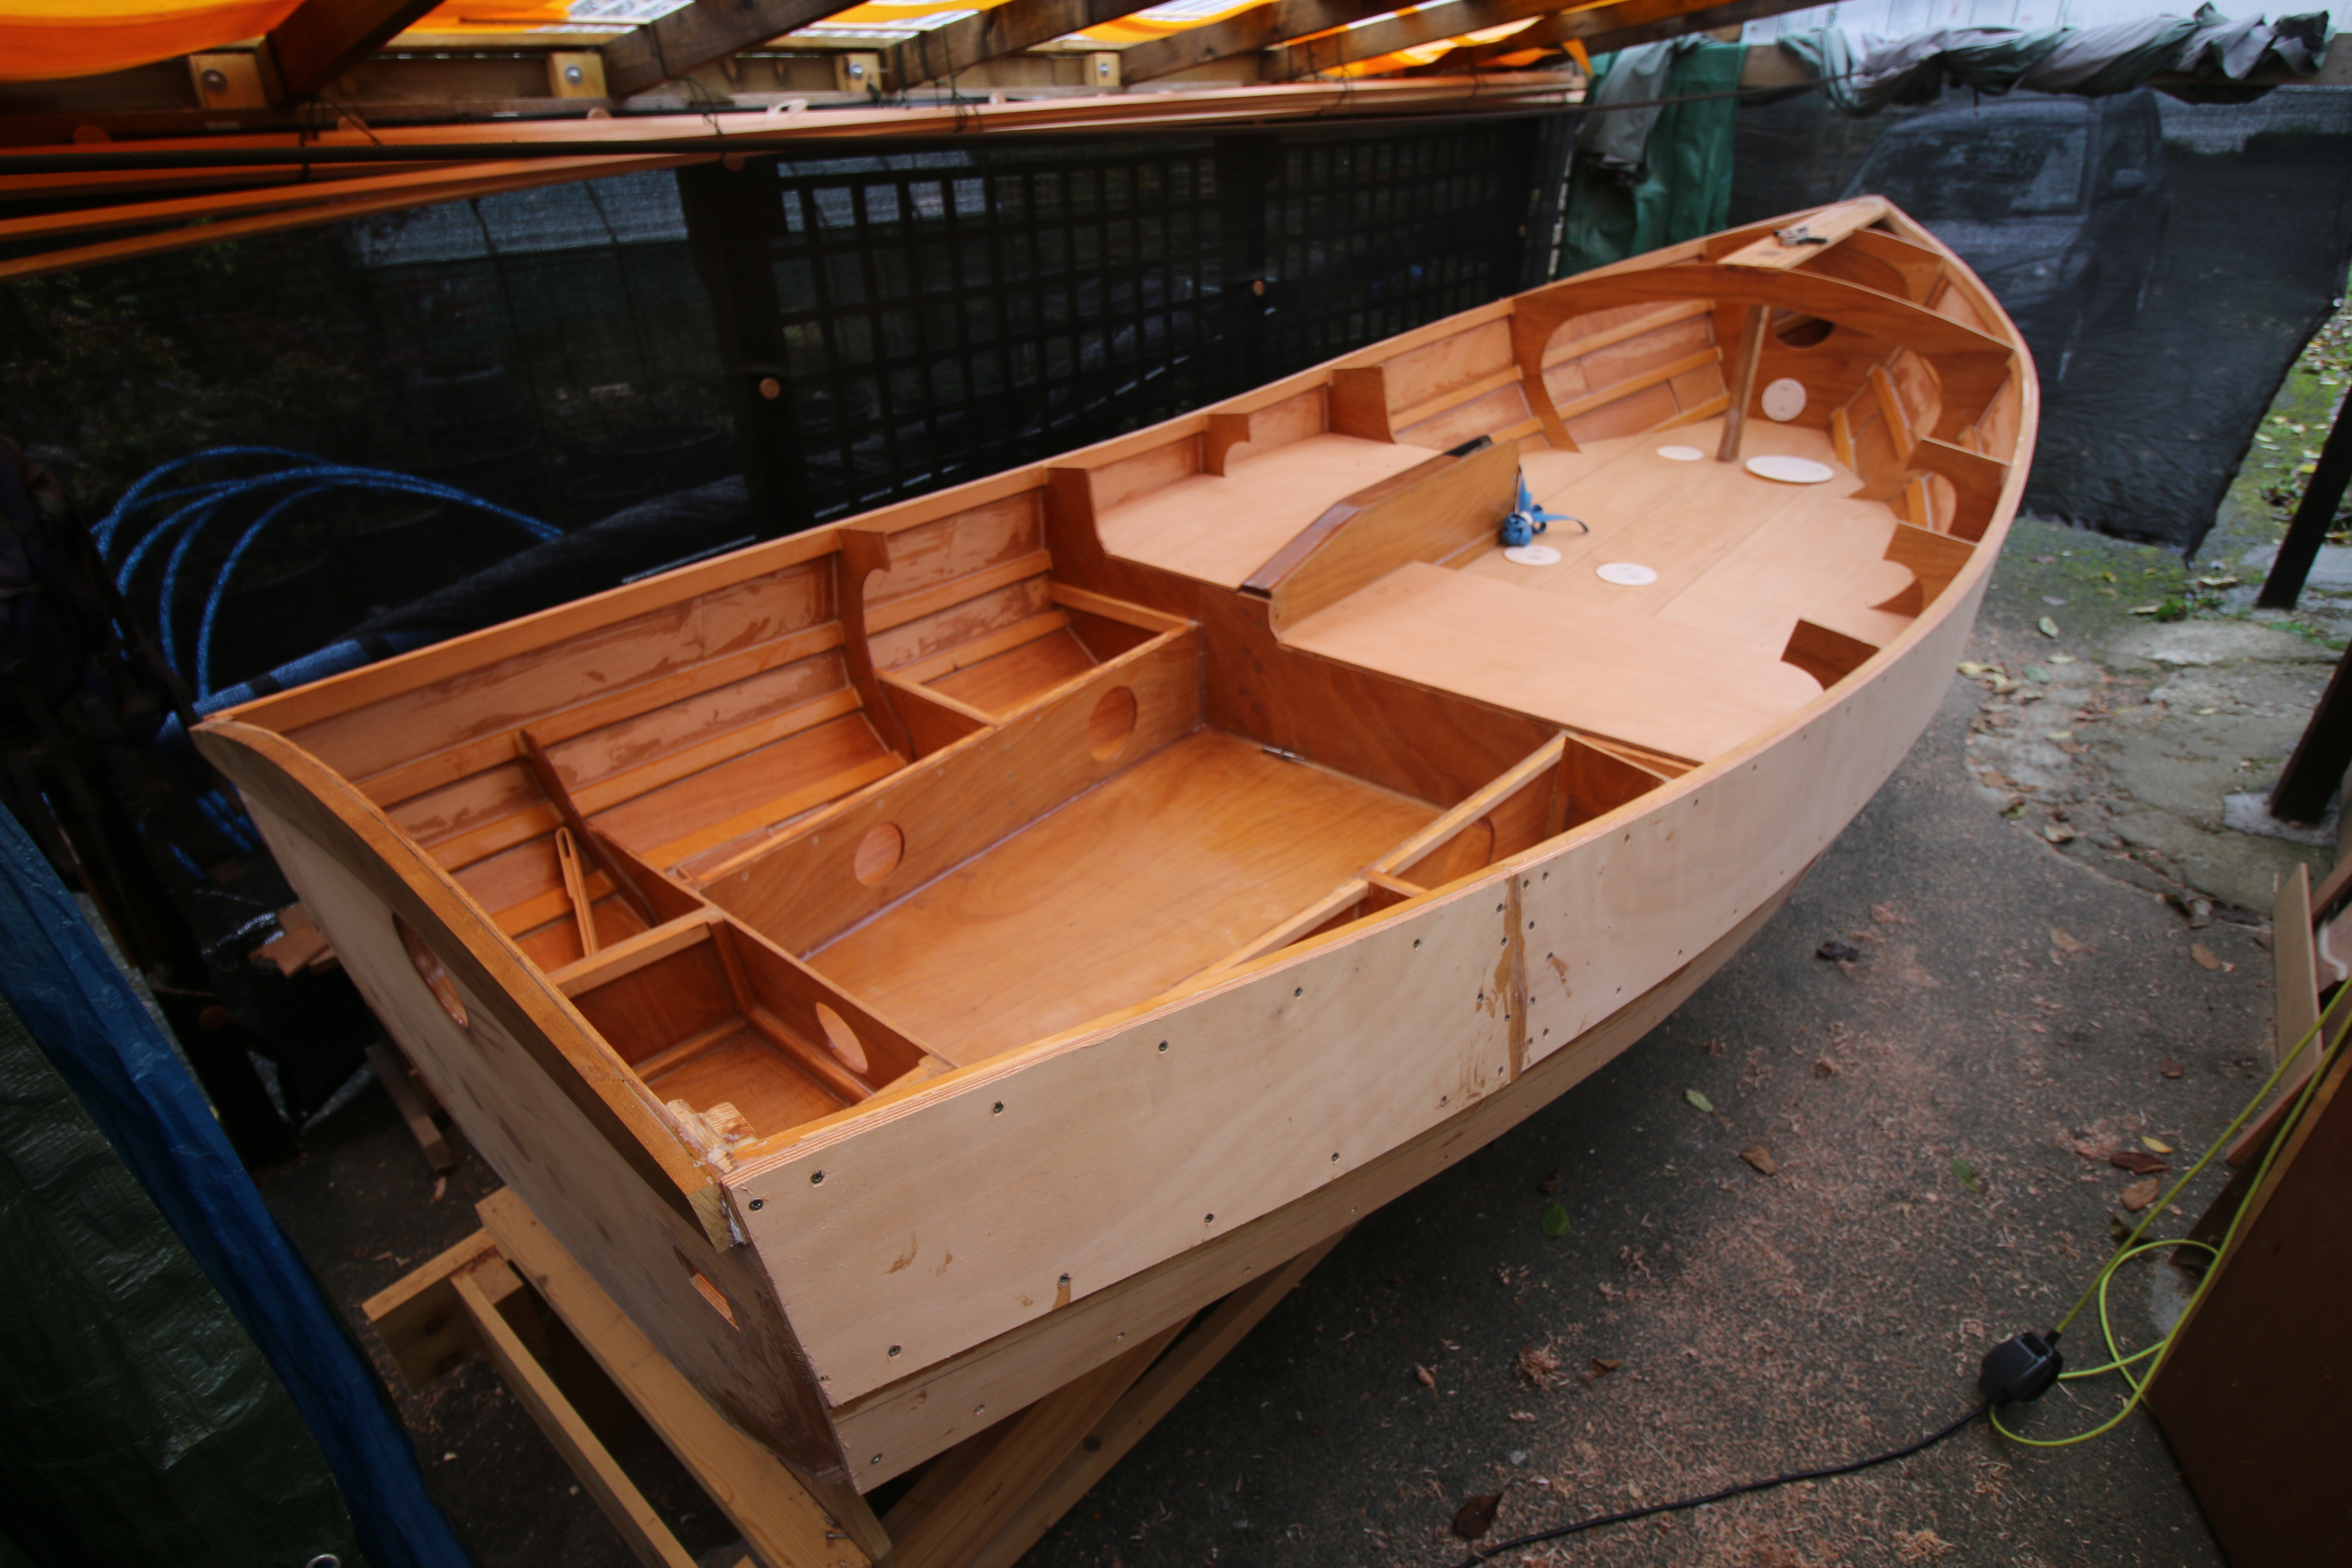
By the beginning of October I had something that looked like an actual boat although I could see even then that the planks would need a lot of edge trimming to look good. It was time to stop though because any job with glue at this time of year – mainly epoxy coating – took several hours to warm the plywood with a heater/dryer and then several hours of heat to effect a full cure.
End of year one and time for a break.


Post links.
Planks : https://dirtywetdog.co.uk/2021/10/04/two-short-planks-too-short-days/
Several plank posts later : https://dirtywetdog.co.uk/2021/11/01/a-long-cold-plank/
In retrospect……
I can’t remember now quite what i’d done or not done at the end of the first year : I think I fitted the forward soleboard bearers and had made the boards themselves, I think I made the kingplank at this stage but I do know that I ripped it out again early on in year 2.
I’d used all of my hull plywood , in fact I had to order another couple of sheets to finish planking the hull, making the soleboards and the cockpit seats. Roughly as per John’s (Welsford) estimate I used about 5Kg of epoxy resin for the construction but used a lot more to coat the inside of the hull and then a lot more in year two to epoxy coat and glass coat the outside…..that’s all in the next post.
I did invest in some new tools throughout the year – first some better marking tools and then a Japanese pull saw with which I cut all of the frames and hull planks. At some time I invested in a table saw – must have been early on because I used that to rip the centerboard strips with.
In terms of work time I spent at least twice to three times the amount of time that the designer says a moderately experienced boatbuilder will take – remember though that i’m a complete beginner and taking an entire summer just to build a hull reflects my inexperience and crushing lack of confidence. To be honest though none of that matters because I did actually build a complete hull and hugely enjoyed myself in the process
End of the year and turning the hull over (November 2021)
The roll-over : https://dirtywetdog.co.uk/2022/03/07/roll-me-over-and-start-again/


Thanks for this excellent summary of the first year of the build Steve! I am currently in the „to build or not to build“ phase and your remarks concerning the process are invaluable to me. Apart from that I have to say that I like your blog a lot (not only the Pathfinder part)!
Best regards from Germany,
Philipp
LikeLike
Thanks, the year 2 post and video are done and edited…..I think I scheduled those for early in the new year. I think now that the process of building a boat and the time taken is worth it but it’s a big commitment even so. Perhaps the only good reason to build a boat is because you want to……..
LikeLike
You have done a really impressive bunch of work on this hull. I have built a 14ft glued lapstrake sailing dinghy and it takes a lot of fortitude and blood and sweat – the hardest thing is taking the decision to make the next saw cut! Well done and keep going.
My sister lives in Devon and next time I am over (I live on the Outer Banks in NC, USA) I would like to visit if that’s OK, so where are you?
LikeLike
Pretty much on the border between Devon and Cornwall on the edge of the Tamar valley.
LikeLike
you are a artist
LikeLike