


Sail Oar & Canvas bushcraft boat project
The TLDR of this post (too long, didn’t read) is that the major part of the boatbuilding & modification work is done and I have flipped the hull over ready to start the exterior sand & repaint : not only that but iv’e also endevoured to film the whole process so there will be a video, one of my new series, that goes with this post. I should say that this is also my second intended post of the same subject and for some reason I found this version slightly more readable.
On the campcraft element side iv’e been out in the local woods photographing and filming myself talking far too much while I show off some of my rusty bushcraft & akingside that iv’e started to lay up the essential campcraft equipment. What follows in this post is the slightly longer version with some details about what iv’e been doing.
Thwarted…
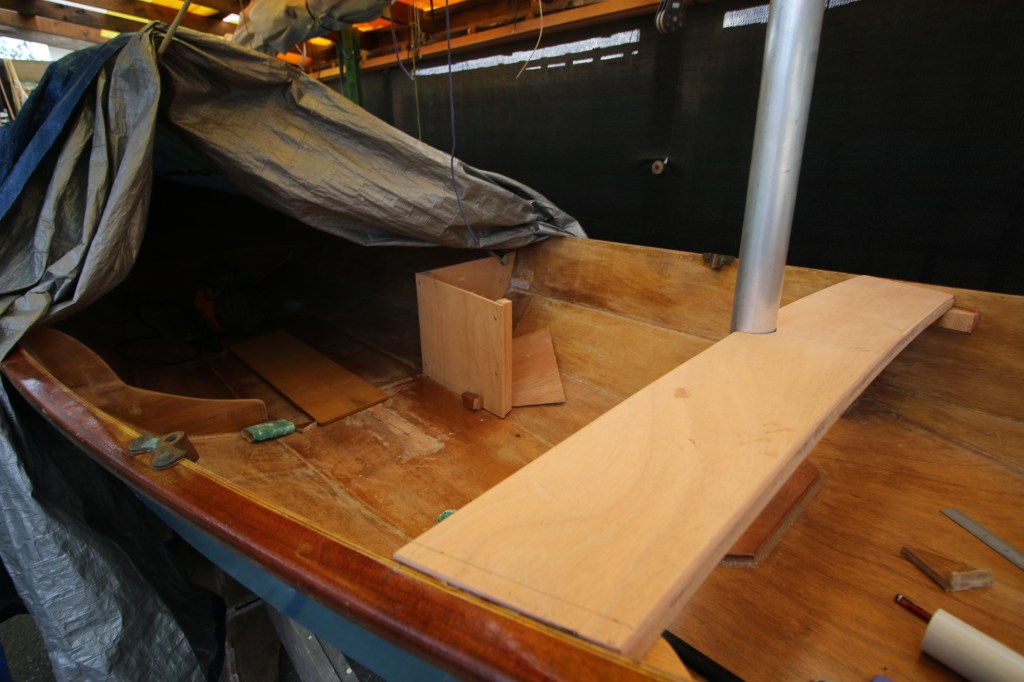
The first new structural element that I added is a new mast thwart just below deck level and it not only (obviously) supports the mast when it’s up but unlike the way that the Skerry is usually built and set up the mast can now be ‘walked in’ rather than having to be lifted vertically and dropped through the original ‘tank’ thwart and into the mast heel holder. My main reason for doing that is that the mast is quite heavy in it’s current form and would be difficult for me to step and unstep with the boat afloat – the main reason for unstepping the mast will be to then use it as the boat tent ridgepole. My eventual plan is to make and fit a lighter mast as I consider the existing one unnecessarily strong and heavy : I fancy carbon fiber tube as a replacement but will most likely end up with a sleeved alloy tube it being a lot cheaper than Carbon fiber.
Iv’e built the new mast thwart by laminating together 3 pieces of 5mm plywood over a curved form to get, by eye, roughly the curvature that will land the thwart ends straight onto their bearer each side. The bearers are short lengths of scrap Douglas Fir and start out as 30mm square section – these will be glued in below the deck edge (and gunnell) but I don’t intend to glue the actual thwart in place, rather I would like to keep it removeable so that when I need to I can still use the for’d rowing station. As a guide i’m using a short length of scrap alloy tube as that’s the tube I intend to build a lighter round section mast tube from.
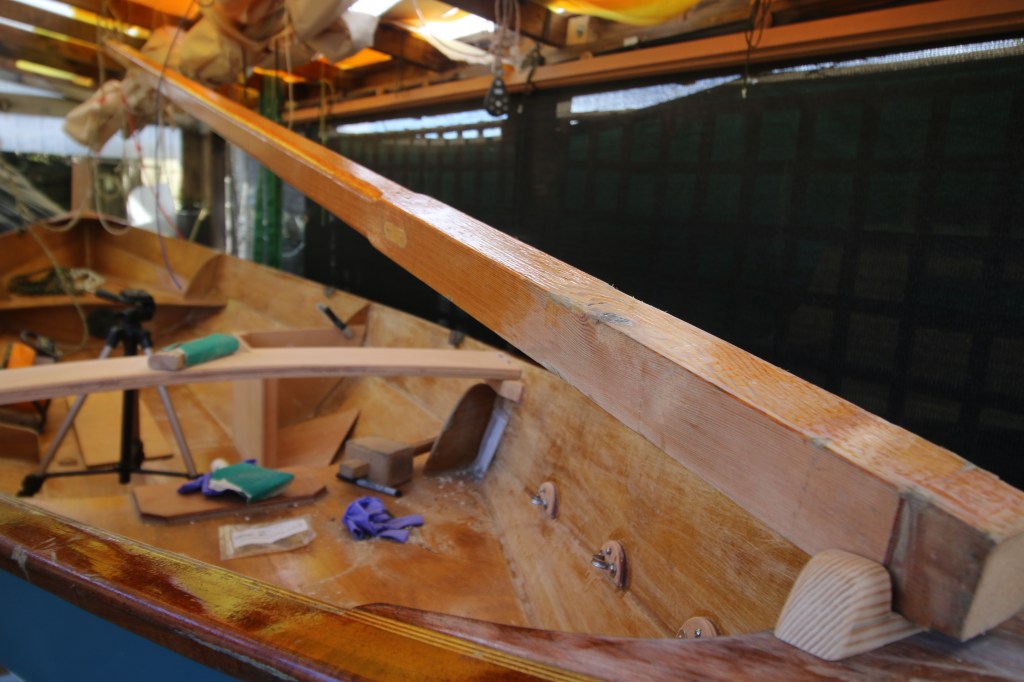
Just ahead of the mast step, and in the stern as well, are two of the other new features which are buoyancy bag forward and aft to increase the buoyancy and as with an open (Canadian) canoe to aid in capsize recovery. This was on the advice of the excellently helpful John Welsford after I posted a short video of someone trying to recover a capsized Dory – similar in hull shape to my Skerry and with the same kind of stability.
Boxed,
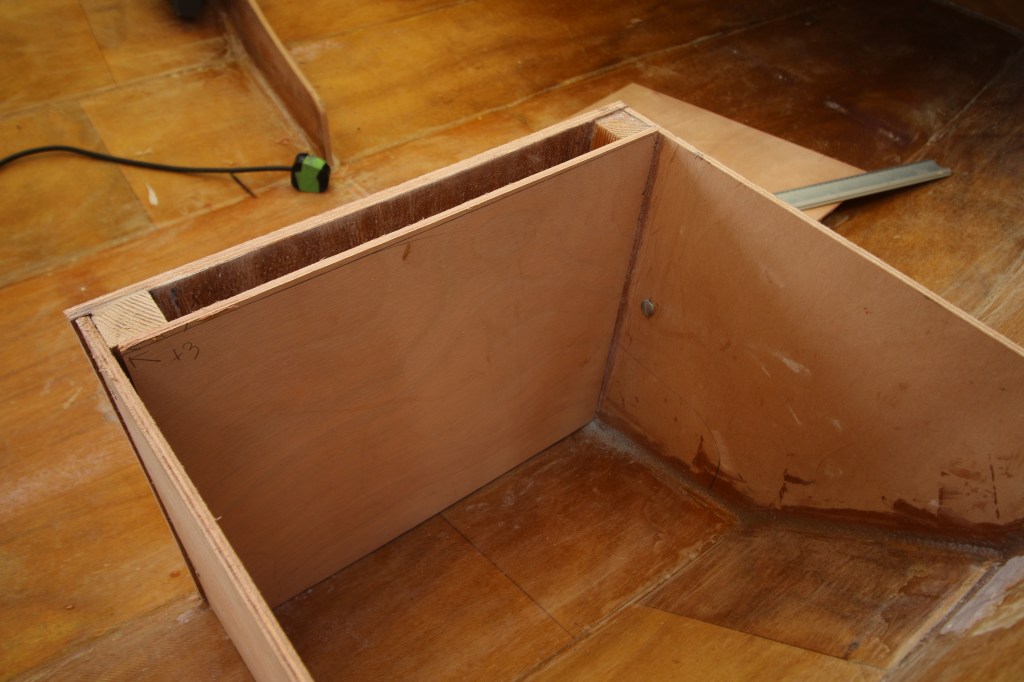
One of the main jobs iv’e been slowly working on is that of building the new buoyancy tank cum daggerboard box off to one side. It’s been a slow old job because I had to make a full set of patterns and I managed to get each piece slightly wrong several times. At time of writing and posting iv’e made all of the second stage patterns and i’m just waiting for the new plywood to arrive – the more accurate my patterns then the easier will be the actual work.
My plan is that the new buoyancy tank will act as a storage locker at the same time as holding the new daggerboard which I am building at the same time. As of ‘current plan’ i’m on the search for a small and light rucksack that will fit the storage locker and which will carry the makings of a walk-out/ bivouac pack without having to access the main kit. I want something that I can carry even in my weakened state and from which I could make a temporary overnight bivvi in the way that I once totally failed to do when I went out with the Pathfinder and it’s first epic failure of a sea trials trip.
Below – I can still see small mistakes even though i’m trying really hard to get the case exact and square.
ReMasted.
I think I need to aim for as light a mast as I can make while still having one that is strong enough as a beam (unsupported by shrouds) rather than as a column (standard rig with shrouds and stays). It seemed best to weigh everything because, although I could take the weight of unfinished alloy tube from the internet, by weighing everything once at this stage I would have the best weight reference for future work.
Today then, as I write, I bought a digital luggage scale and ran around the place weighing the entire Skerry rig (10.6 Kg) then the existing wooden mast (4.4 Kg) and finally the lightweight, 16 gauge alloy tube that I bought for the passagemaker (2,44 Kg) I did also weigh the length of 10 gauge alloy tube that I thought might make a viable tube but I had to convert that up because I only had a 3 meter length (3,68 Kg) the supplier tells me that a full 4 m length would be 1,29 Kg per meter (I work that out as 5.16 Kg – thus heavier and a lot less attractive than the existing square section wooden one. Even if I were to start with a 16 gauge tube and give it a half sleeve internally I would end up with something like 3.6 Kg – not much weight saving except that less of it would be at the top. It might be best to stick with the wooden mast and save weight high up by using a lightweight tube as a yard : a slightly smaller tube (44mm 16 gauge) should do for a yard that small and comes in at 0.58 Kg/M)…..you can tell what kind of morning iv’e had !
The rule with weight saving in boats has always been to reduce weight in the ends of the boat (bow,stern and aloft) because that reduces the boat’s tendency to pitch heavily and more energy is better used to drive the boat forward rather than up and down. In the case of a small cruising boat such as mine it doesn’t matter that much although with even a small Lug rig the yard can represent a heavy thing swinging around high up. In time there might be a valid argument to opt for a length of Carbon Fiber tube as a yard but for now i’ll be satisfied with alloy tube.
Remast rethink……after much thinking and much time spent weighing everything I went back to the original intent of the designer and decided to stay with the wooden mast until such a time as I can make one myself : that will be late summer next year as long as I can buy a couple of lengths of clean Douglas Fir.
Make provision for….
Something that I have to think about now and make provision for in the boat’s near future is to make it possible to bivouac inside the boat and have some form of shelter there : this is likely to be in places where it’s much more difficult to land and make a foreshore camp. What I have in mind is making the simplest form of shelter and this is essentially a flysheet or tarpaulin rigged over the mast using it as a solid ridgepole. My idea right now is to have the forward end set in some kind of shaped block at the bow and then the peak of the mast sitting in some kind of crutch at the stern – the fabric should then form a relatively simple vee shape rather than the more complex shape of a tunnel tent with curved rod end supports.
Mast used as tent ridgepole utilizing bow-heel chock.
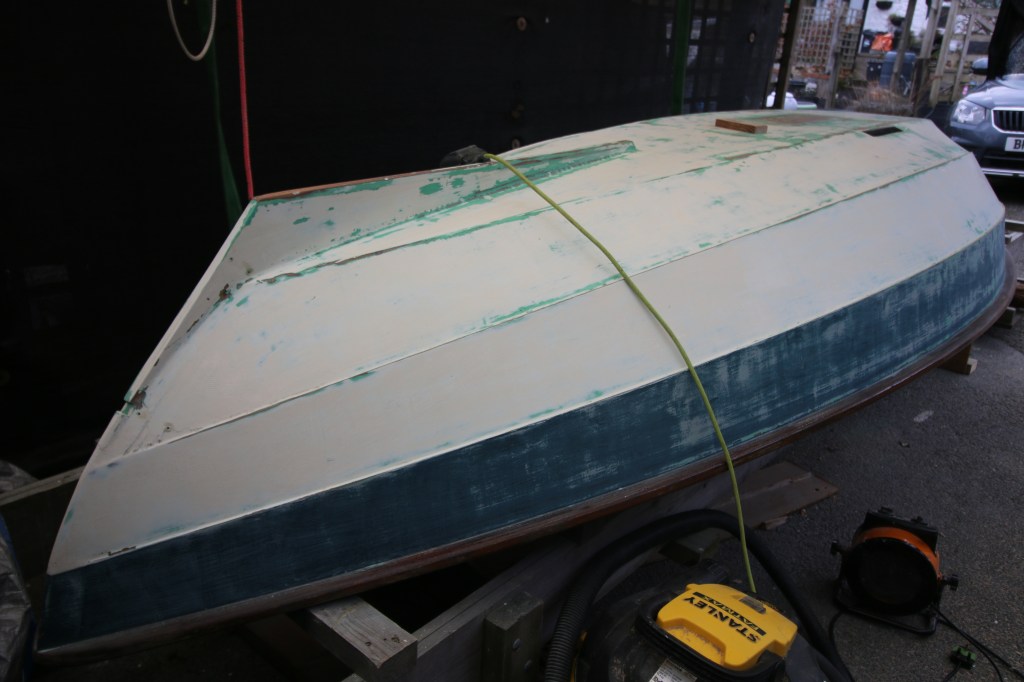
Flipped and mostly sanded.
As I edit the post, ready to schedule it for a Monday morning, the Skerry is now bottom up on the outside bench and ready for a final wash down before I lay on the first coat of primer. The problem here is that it’s been either cold or cold and damp for weeks – around 5 or 6 degrees during the day so in my book that’s too cold for paint. The forecast later in the month is for a couple of days at a balmy 9 degrees so I may well do it then : as for now I am ‘icing the cake’ – covering the new daggerboard with epoxy and filler before several days to be spent with a longboard, fairing it to final shape.
New video post…..
