

Making a mast and trying to keep things simple.
Most readers will, I guess, be familiar with the acronym ‘K.I.S.S.’ and for those who don’t then it means Keep It Simple Stupid and it gets used a lot around boats and engineering – in this post and having tried again and again to come up with the right rig for the PATHFINDER I finally take a leaf out of the KISS book and apply that to my rig build.
Note to readers…..I rarely do this – post an older and earlier version of the same post but one that didn’t make the final cut but…..later on today the original post , or at least the 2nd or 3rd iteration of that post will appear here : https://dirtywetdog.co.uk/?p=14779 My main reason for doing that is that I did a lot of thinking about the rig and as I write this one iv’e almost got 2 different rigs ready to go in that the boomkin is in, the alloy tube ordered and with a bit of messing about with re balancing the rig and boat I could still make a Yawl. According to designer John Weslford the sloop option should be faster upwind in most conditions …..especially in the case of the rig that i’m actually building right now…….the original post might be kind-of useful for some context though.
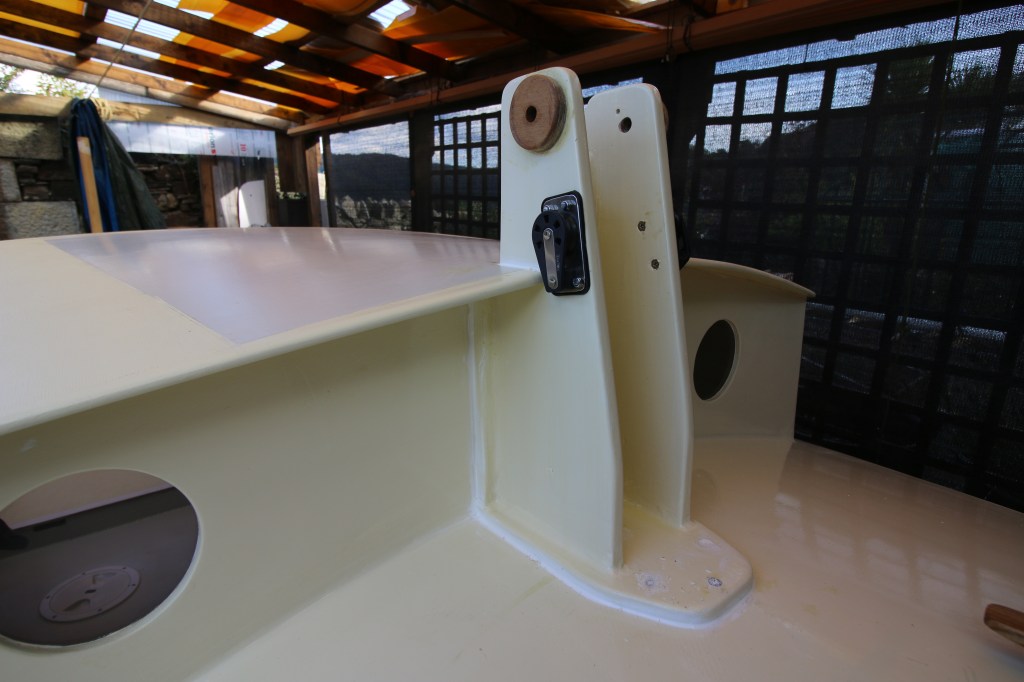
As I write it’s late September 2022, we’re just back from a late summer camping trip and even as I sit here it’s getting a lot cooler and the light is already going. I have however done the main work on the mast for the Pathfinder and this evening for the first time it’s sitting between the tabernacle and the boom crutch which I made from some scrap plywood today ; today also we had a quick run into town to order some stainless steel fabrication for the shroud cleats and i’ll soon be at the point where I need some rope and wire.
That’s getting ahead of myself though and this is also about my third fourth fifth……whatever…. attempt to finalize what i’m doing with the rig although I did go ahead and build the mainmast as I planned and even built and fitted the tabernacle for it too. Going back quite a bit some readers will remember that I was definitely going to build a west country style standing lug rig ….definitely that is until I did some work on the practical problems involved, then I was absolutely definitely going to build a high aspect/short gaff rig along the lines of the Dutch boats and Hanneke Boon’s rigs for the Wharram cats. Once again I actually did the work of measuring and figuring out the trigonometry of those rigs and realized that it just wasn’t going to work in the way that I thought so in the end I was absolutely definitely definite that I would build a simple gaff yawl with slightly different proportions – until today that is.
Today I think i’m going to keep it a lot more simple and just build a sloop and almost exactly as per plans – just with a taller mast and a slightly narrower head on the mainsail.
Building the mast itself was a nice project which, having put the last coat of paint on today, I thought to talk a little about the design and construction so :
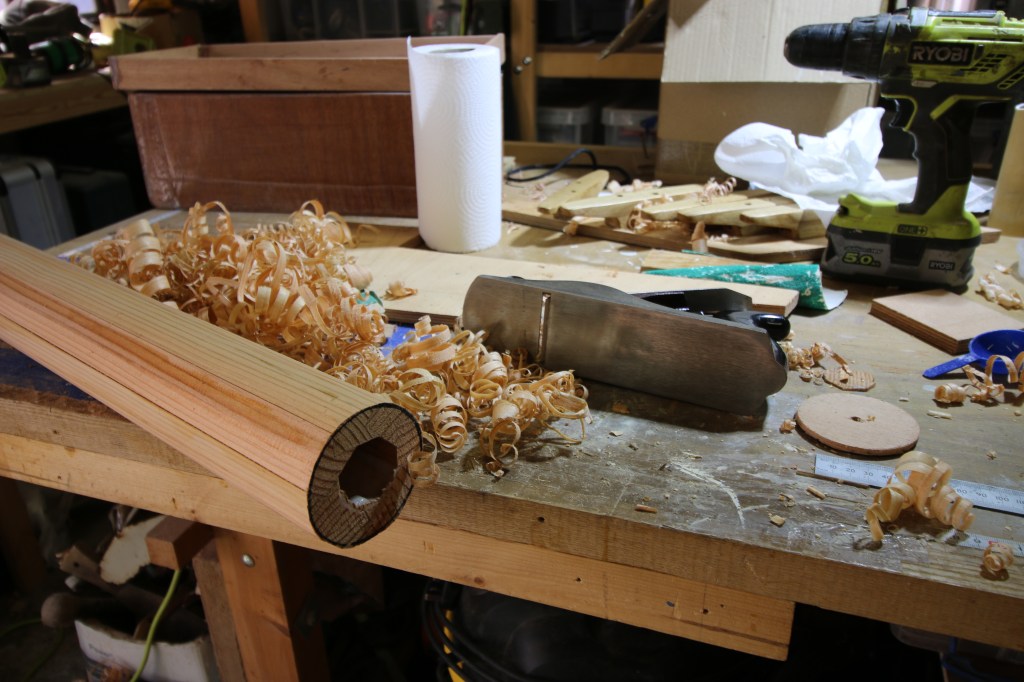
Having looked at all the options available to me – basically alloy tube, carbon tube or hollow wood construction, what I ended up doing is making a hollow wooden mast using the 8 stave birdsmouth technique and a simple online calculator to work out the stave dimensions. Rather than trying to do the birdsmouth machining myself I ordered the 8 staves of clean Douglas Fir and the machining all in one go and once again from my local timber supplier (John Moody in Devon). When my partner went to collect it John had somehow joined and taped the staves together so it arrived as a tube – I merely joke that I should have just sent him some glue but there’s still quite a lot of work to do before gluing the whole job together.
As a quick description today what I had to do was taper each stave using a simple jig, make a temporary internal packing piece to assemble the mast around, do a practice dry assembly because 8 pieces of springy timber are kind-of difficult to organize with just one set of hands…..and then glue the whole lot together but in 2 halves so that I could take apart again and final fit the actual 8 sided internal packing pieces which make the mast solid at top and bottom.
For a bench I used the frame which I built the actual boat on with some simple forms added to act as supports for the bottom 3 staves, when I came to glue everything up I taped off a positive and negative edge on 2 matching joints, applied glue and clamped the whole thing together with lots of long plastic cable ties. With epoxy resin it didn’t need much clamping pressure but it did need a tie-clamp at least every foot of length and I chose both a cool early morning and slow hardener in the resin to give myself a long working time.

I think the most difficult and technical part of the whole job was making the tapered octagonal packing/filler piece for the topmast – the similar piece for the heel was a lot simpler being also octagonal but parallel sided. That took a fair amount of slowly planing to shape but about a laf day’s actual work and a lot of lifting the top half of the split tube on and off to get everything to a good fit to glue. To finish the actual construction I then coated the inside of each mast half, glued in the top and bottom packing pieces and finally glued the 2 halves together.
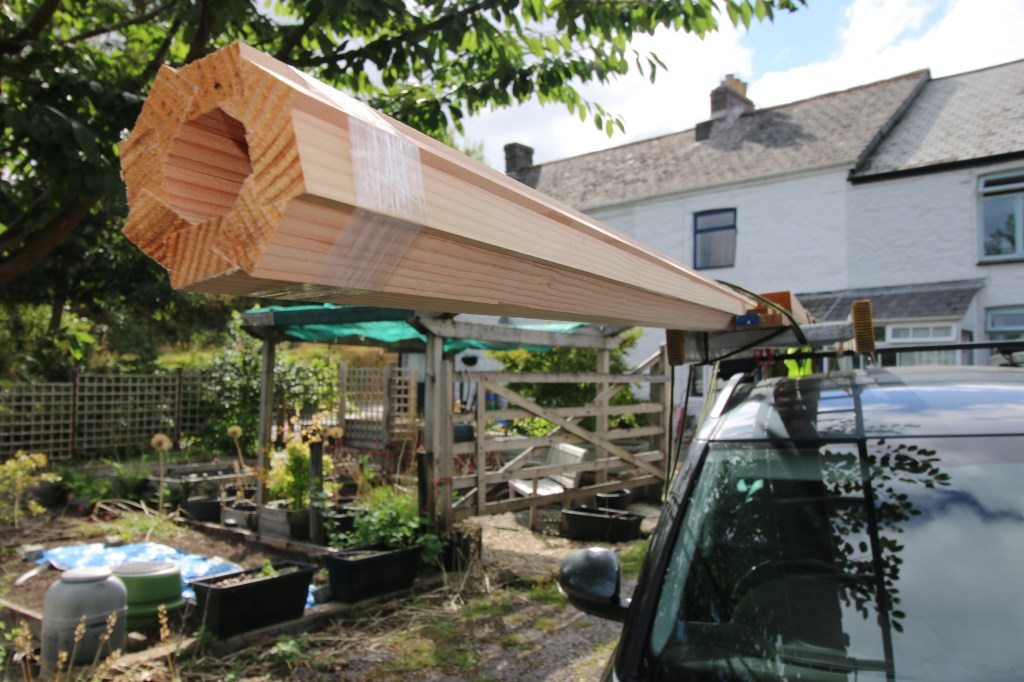
I actually ordered the staves as the maximum length that John could supply, made the pole over-length and then cut the bottom 600mm off to give me the end piece to play with in the workshop – basically learning how to take the 8 sided tube down to firstly 16 sides and then slowly into an almost round tube. The first few hundreds of millimetres I actually left as an 8 sided spar as that pivots in the tabernacle and I wanted the side faces square at that point. That was a lot of time with the longest and sharpest plane that I own, working slowly and keeping turning the spar over and over until I was close to round and then sanding with a home made longboard.
It’s probably not essential but to reduce wear on the tube I coated the aft face with a single layer of glass cloth bandage, epoxy coated the whole mast and then primed, mid-coated and then finished with the same gloss as I used for the deck. Some people I know have objections to painted spars but I just happen to like them that way. For the shrouds and forestay I have glued and thru-bolted a pair of shroud support chocks to short sections of upper mast that I left square for that purpose – as and when I get the stainless steel plates for those I will show that work in a future progress report.
During the mast construction work I also built the plywood tabernacle which is bonded to both the foredeck and the forward face of the cuddy – under the foredeck of course is the mast compression post that I built as per the original yawl rig plans but then added side cheeks to take the mast compression from a bit further aft…..inn fact it’s where it would be had a I built it as a sloop in the first place. As of the end of play this week the mast is both fully painted and sitting in between the tabernacle and the stern deck support which I made from scrap plywood today and is laminated to match the crown of the little aft deck. The first version (below) is a bit too high which would make it potentially unstable on the road so that’s going to be dropped to the height of the aft web.

This coming week I intend to pull the whole boat forward, out from under the shelter for the first time and step the mast with some temporary rope shrouds and forestay…..then I can accurately measure those and have some wire ones made up. I have ordered the Bronze chainplates and already made and fitted the Iroko standoff’s for them, the next job on the rig construction side will be to make the gaff and possibly a laminated gaff saddle.
Until next time.